How the current interface works
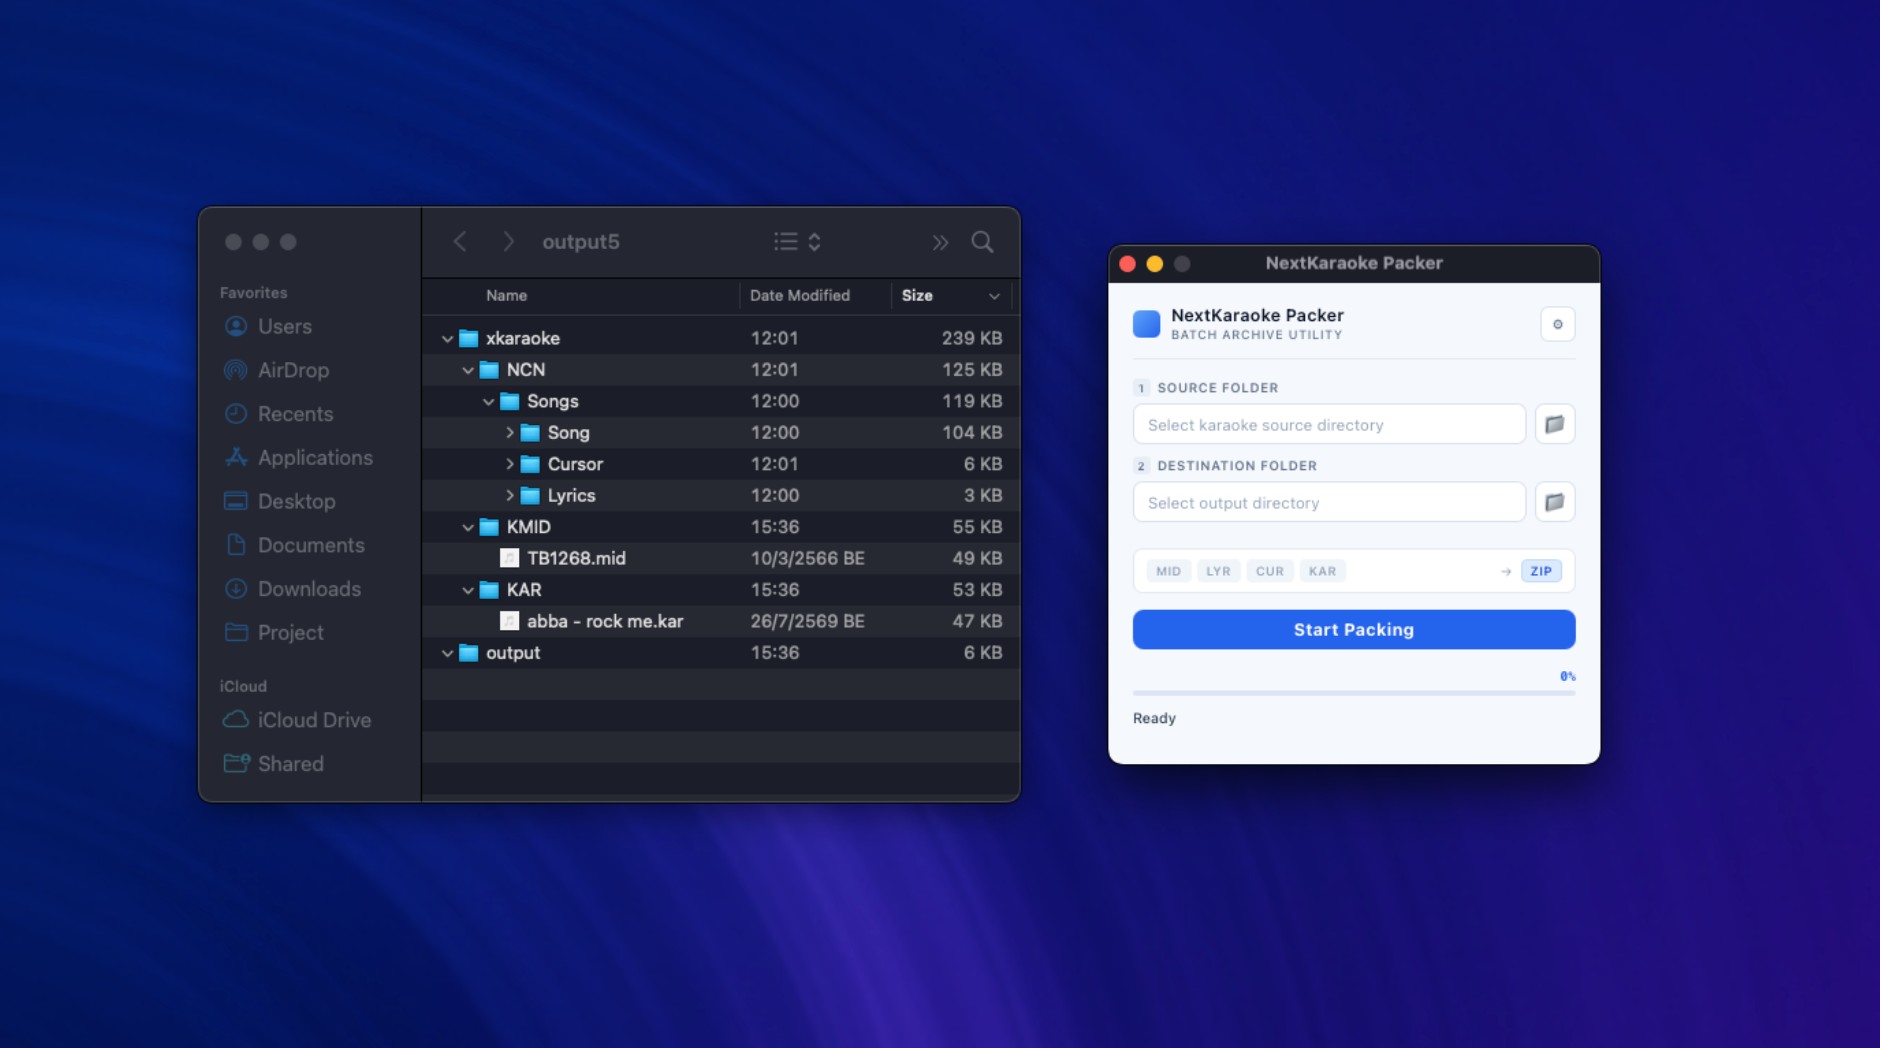
NextKaraoke Packer เป็นโปรแกรมแยกสำหรับสแกนโฟลเดอร์เพลงขนาดใหญ่และสร้างไฟล์ ZIP เป็นส่วน ๆ นอกเบราว์เซอร์ หน้าต่างรุ่นปัจจุบันประกอบด้วยช่องเลือกโฟลเดอร์ 2 ช่อง แถบแสดงรูปแบบไฟล์ ปุ่ม Start Packing แถบความคืบหน้า และพื้นที่แสดงสถานะ
ดาวน์โหลด
Windows: NextKaraokePacker.exe
MacOs: ไม่พร้อมใช้งาน
แล้วทำตาม 3 ขั้นตอนด้านล่าง เมื่อสร้างไฟล์ ZIP เสร็จแล้ว
ให้ไปต่อที่หน้า นำเข้าเพลงจากไฟล์ ZIP ใน Next Karaoke
Step 1: Choose the input and output folders
- 1
Open NextKaraoke Packer. The main window is fixed-size and has Source Folder, Destination Folder, the format strip, Start Packing, progress, and status controls.
- 2
Click the folder button beside Source Folder and select the root folder that contains the karaoke files. You can also type the path in the field.
- 3
Click the folder button beside Destination Folder and select an output folder with enough free space. Use a different folder if you want to keep the source library unchanged.
- 4
The format strip summarizes the input formats and shows ZIP as the output. The scanner groups files by song name and recognizes NCN files (.mid + .lyr + .cur), .kar, standalone .mid, and .mp3 groups.
Step 2: Open Settings and choose compression options
- 1
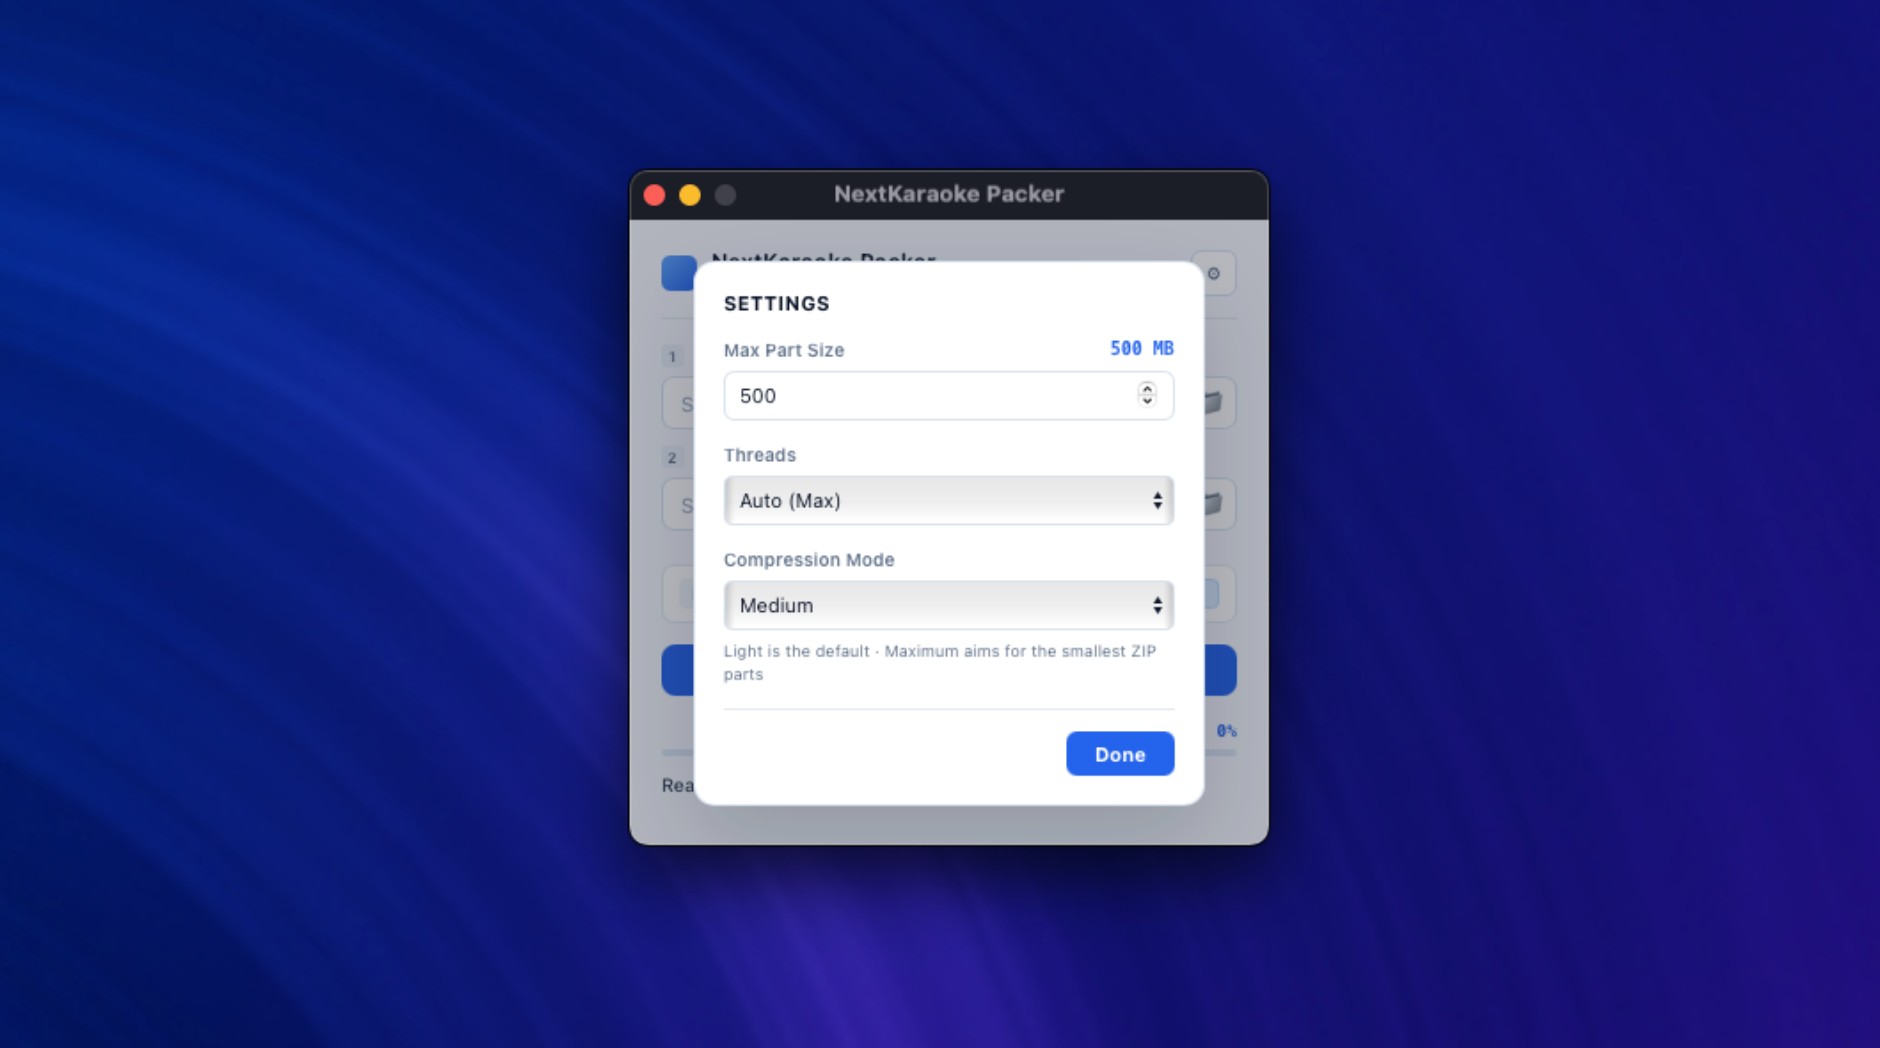
Click the gear button to open Settings.
- 2
Set Max Part Size between 50 and 2,000 MB. The default is 500 MB and controls when the program starts a new ZIP part.
- 3
Choose Threads as Auto (Max), 1, 2, 4, 8, 16, or 32. Auto selects the available CPU setting; stronger compression modes may cap the effective worker count to reduce memory spikes.
- 4
Choose a mode: No compression, Light, Medium, or Maximum. Click Done to close Settings.
Compression modes
Fastest
Use only when processing speed matters more than storage. The output may be larger because the files are kept almost as-is.
Fast and compact
A practical choice when you want the job to finish quickly while still making the output much smaller.
Balanced
A middle choice between processing time and storage. It takes longer than Light but aims for a smaller result.
Smallest result
Choose this when saving storage is the top priority and you can wait longer for the result.
Which compression mode should you choose?
Step 3: Start packing and continue in Next Karaoke
- 1
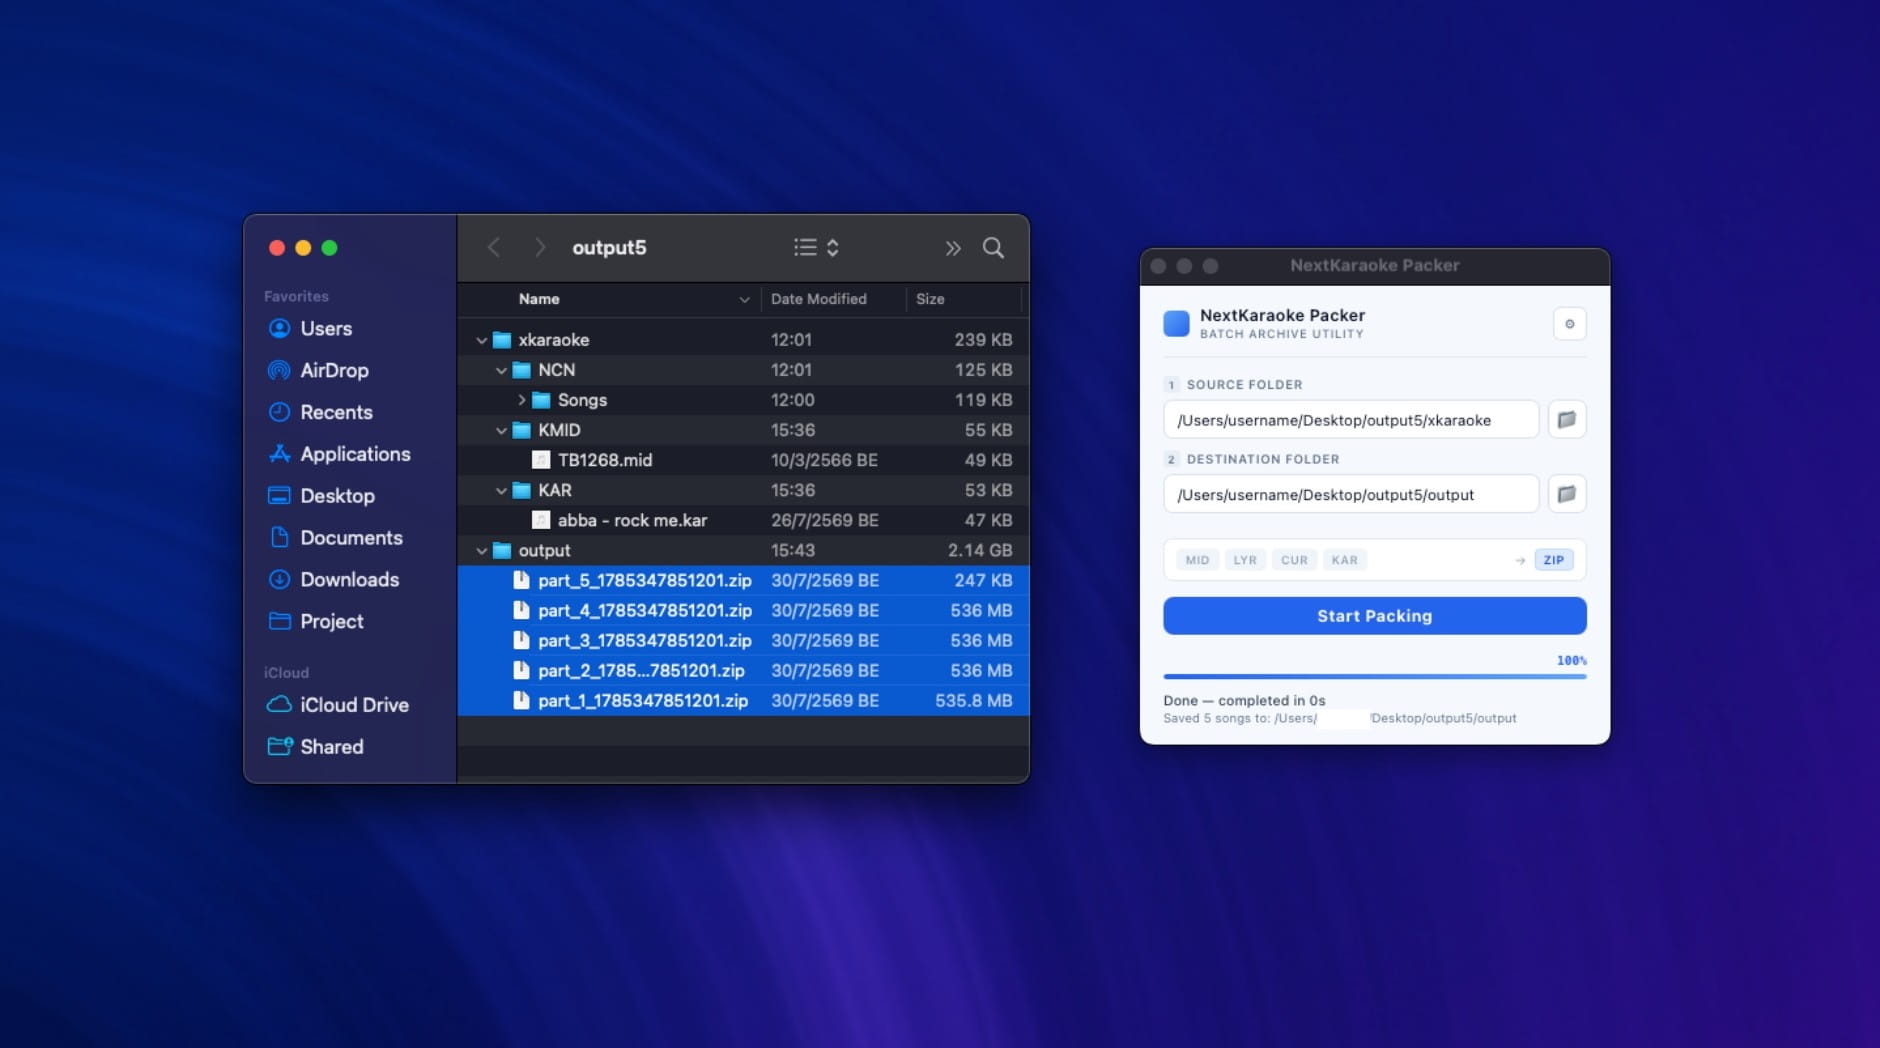
Click Start Packing. If either folder is empty, the program shows an alert asking you to select both the source and destination folders.
- 2
While running, the button changes to Processing..., the progress bar shows a percentage, and the status area shows the current phase. The program scans files, validates song groups, and then packs the valid songs.
- 3Wait for the status to show Done. Open the destination folder and confirm that files such as part_1_
.zip were created. The compressed modes store each song as an .nkm bundle inside the ZIP part. - 4
Return to the Import ZIP page, enable compressed song library mode, select every ZIP part, and click Import.